Build a UE4 compatible static lib in VS2013
Introduction
This is the first tutorial in a two (or maybe three) part series that will explain how to integrate libraries not built by UBT into your UE4 games or plugins. This tutorial will cover building of static libraries in VS2013, but most of this will also apply when building dynamic libraries.
We’re going to build the pugixml library, a small and lightweight XML processing library written in C++. I’ve chosen this library because it doesn’t have any dependencies, only consists of three source files, and is easy to configure, so we can focus on the details that are specifically relevant to Unreal Engine 4. The final VS2013 project is available on GitHub.
Configure pugixml
The library can be configured by editing pugiconfig.hpp.
Unreal Engine 4 uses the Unicode character set by default (characters are represented by wchar_t
instead of char), so lets enable Unicode support in pugixml:
|
|
Usage of the STL is frowned upon in Unreal Engine 4 code because it comes with its own set of
standard-for-ue4 classes you should use instead. Third party libraries can still use the STL if
needed. pugixml has the ability to use the STL for strings and streams, but it can also work
quite happily without it, so lets remove the STL dependency:
|
|
By default UBT will build projects with C++ exceptions disabled, it’s best to keep this setting
consistent across all the libraries that are linked into a game project. We can prevent pugixml
from throwing C++ exceptions like so:
|
|
Project Properties
Platforms
We’ll need to create 32-bit and 64-bit versions of the library. The 32-bit version will be used in shipping builds (by default), and the 64-bit version will be used in development editor builds. VS2013 sets up a 32-bit platform by default, so we just need to add the 64-bit platform to the project. To do so:
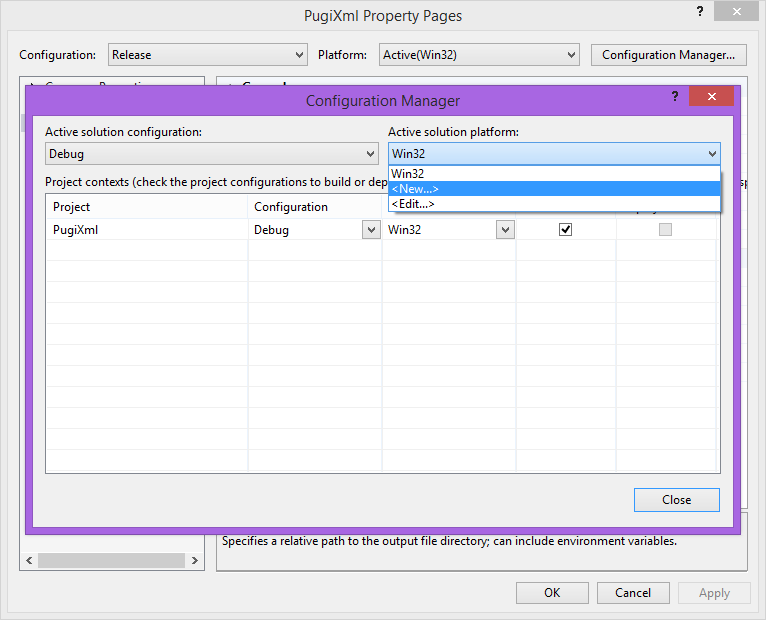
- Right-click on the project in the VS2013
Solution Explorer, selectPropertiesfrom the context menu, and open theConfiguration Managerdialog: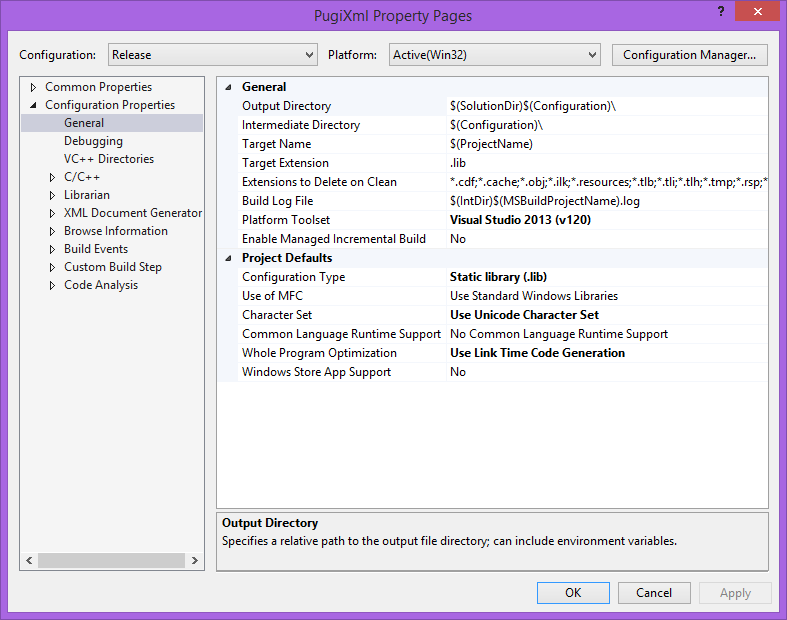
- Add a new platform:
- Select
x64from the drop-down, and pressOK: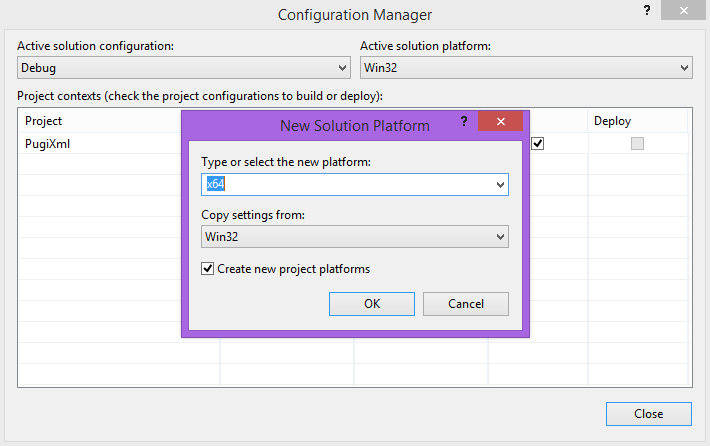
General Properties
The naming convention and directory structure you use for the library binaries is entirely up to you, however, future tutorials may assume you’ve set things up as described here.
- Select
All Configurationsfrom theConfigurationdrop-down. - Select
Win32from thePlatformdrop-down. - Set the following properties on the
Configuration Properties/Generalpage as indicated:Output Directory:$(SolutionDir)Build\\Intermediate Directory:$(SolutionDir)Obj\\Win32\\$(Configuration)\\Target Name:$(ProjectName)-Win32-$(Configuration)
- Press the
Applybutton.
- Select
x64from thePlatformdrop-down. - Set the following properties under the
Configuration Properties/Generalsection as indicated:Output Directory:$(SolutionDir)Build\\Intermediate Directory:$(SolutionDir)Obj\\Win64\\$(Configuration)\\Target Name:$(ProjectName)-Win64-$(Configuration)
- Press the
Applybutton.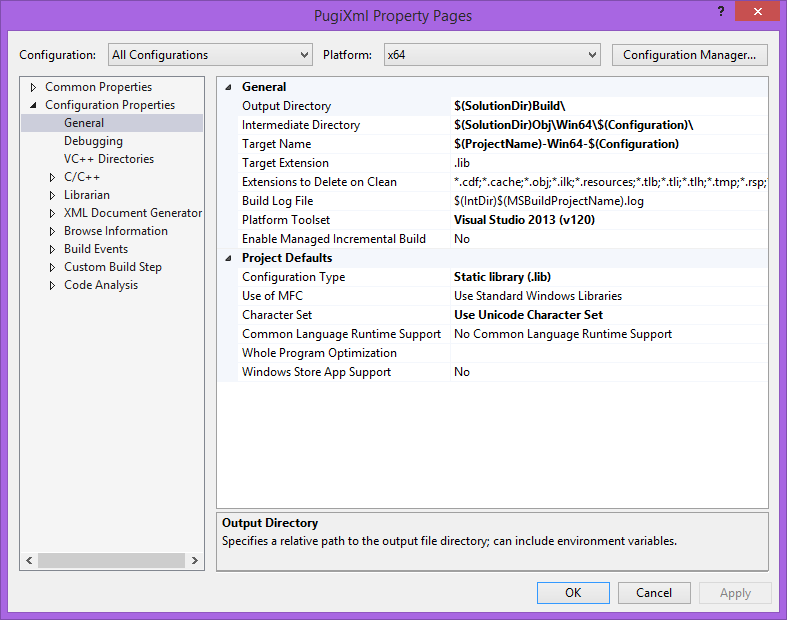
- Select
All Platformsfrom thePlatformdrop-down. - Ensure that the
Character Setproperty is set toUse Unicode Character Set.
C/C++ Properties
- Ensure that
All ConfigurationsandAll Platformsare still selected. - On the
Configuration Properties/Code Generationpage setEnable C++ ExceptionstoNo, and press theApplybutton.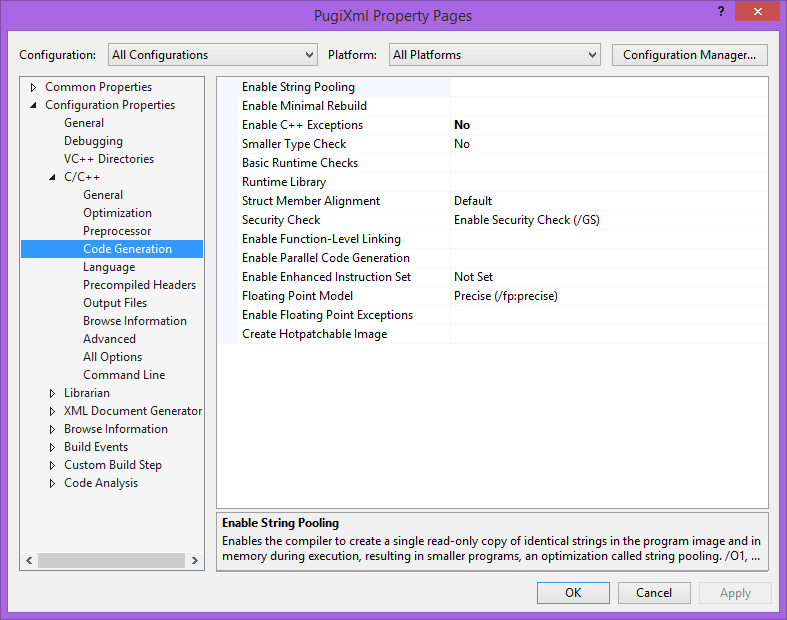
- On the
Configuration Properties/Languagepage setEnable Run-Time Type InformationtoNo, and press theApplybutton.
- Return to the
Configuration Properties/Code Generationpage. - Select the
Debugconfiguration, and ensureRuntime Libraryis set toMulti-threaded Debug DLL (/MDd). - Select the
Releaseconfiguration, and ensureRuntime Libraryis set toMulti-threaded DLL (/MD)
Build
You can now quickly build all four variants of the library by selecting Build->Batch Build...
from the main menu in VS2013.
